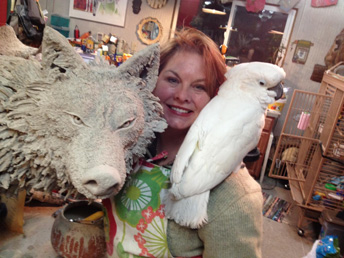
"My intention is not to create a biology project, even though that is my educational background. My intent is to give the animal spirit and presence, while exaggerating things like foot and head size." Gina Hollomon

All of my pieces are one-of-a-kind and hand-sculpted from clay. I have a large electric kiln that is used to ‘bisque fire’ the raw clay and make it hard enough to survive the firing "Raku" style.
The first step is to determine the size and stance of a piece. I made some rough sketches after studying images of wolves from different angles.
Next step, making the armature, is very time-consuming. I want to build any large piece hollow so that: (a) it will sustain the firing without blowing up and; (b) to cut the weight as much as possible. My armature for this piece was a large block of Styrofoam. Using saws, knives, files, cheese graters, sheet rock sanding blocks and sand paper, I carved the armature in such a way that the wolf would have natural movement in his body and not be blocky and frozen.
Then I cover the armature with batting to give it some cushion so that the clay will not crack off the form as it dries. Clay shrinks about 10 percent from wet to dry.
Since the armature in this case did not include the legs, I cut wooden dowels for the front legs. Posts held up the wolf’s rear so I could free form his back legs.
A supplier in Tacoma, Washington formulated the stoneware-based clay specially suited for my sculptural and firing needs. It includes paper pulp for strength before firing and reduced weight after firing.
Sheets of rolled clay were used as a base layer on the armature and then the back legs were formed, using a high heat gun to stiffen the clay as I worked.
I focused on the wolf’s musculature first, again keeping his movement natural and loose. My intention is not to create a biology project, even though that is my educational background. My intent is to give the animal spirit and presence, while exaggerating things like foot and head size.
I keep my sculpting tools simple. Knives help form longer hair and I use a wire brush with four or five strands of thin wire to form the shorter fur and face. The eyes are also made from clay.

When the clay became stiff enough, I took the wolf outdoors and burned the armature out with a torch (wearing a respirator).
I continued to work for about two months adding hair, making the tail (which is the only separate piece) so that it balanced inside the body. Soon after his eyes were finished, the wolf took on his own personality and guided my work.
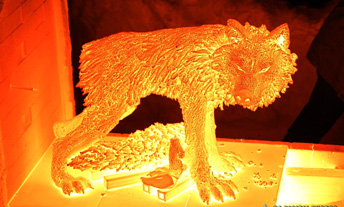
Once I was sure all of the clay was bone dry, I had two strong friends gently move him from inside my studio to the electric kiln, which is outdoors in a kiln shed on the side of my studio. We all held our breath. I had made careful measurements to ensure that he fit, but it was close. His ears cleared the lid by 1/8-inch and there was 1/4-inch on either end. His tail was on the shelf between his legs. This bisque firing was about 2,200 degrees F and made the clay hard, but ready to accept glazes.

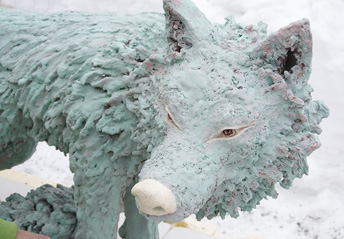
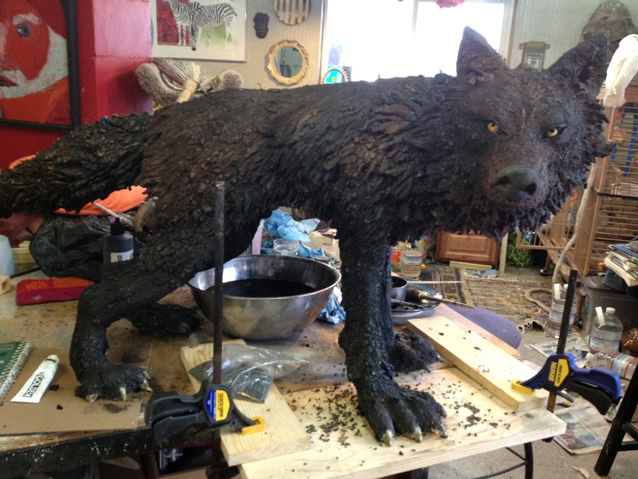
The glaze process that I use is a modified version of an ancient Japanese style firing called Raku. It is used to fire cups for tea ceremonies. Glazes often have iron, copper and other metallic materials that give a beautiful array of color. Since I wanted my wolf to be dark, my choice of glazes was a crusty black layered with other non-shiny copper-based glaze. I used a yellow and copper combination on his eyes.
More about Raku firing: in partnership with a good friend, potter and kiln builder in Homer, we designed a Raku kiln that could be used to fire my large-scale work. The shape is that of a covered wagon. The lid fits on rails like a small railroad track and rolls off the base where the shelves are located. It is heated by natural gas that shoots into the kiln on three burners. Normally pieces are heated up to 1,800 to 2,000 degrees F and immediately removed from the kiln and placed in large containers filled with combustibles such as different quality papers and sawdust. The glazes react with the combustibles and the rate of cooling to determine the color. For example, copper can come out blue, green, brown or copper based on how it cools. Patterns can form based on rate of cooling, flame marks and smoke.
The wolf was much too heavy, delicate and cumbersome to move easily, much less when he was 2,000 degrees. A good friend made a rectangle steel box that was large enough to fit easily over the wolf while stuffed with combustibles. It had handles on both ends and needed two people to ease it over the piece as soon as the kiln lid slid away. This process was a leap of faith; since I had never used this method before. Thank the fire gods it worked.
The wolf spent the night cooling in the steel box and the next morning my strong friends returned and removed the box to unveil the finished result. I spent a few days cleaning away excess soot and ashes to reveal the finished product you see today.
The wolf is fiber glassed to a plywood base which is covered with river gathered sand, glacial silt, gravel, rocks and driftwood so that he feels at home in his natural environment.

This article was originally written in 2011 for "Milepost 43," a blog for Denali's Artist-in-Residence program edited by Timothy Rains.
Last updated: June 12, 2020
