Last updated: June 11, 2025
Article
Beaver Crochet Pattern

NPS/ E. Collins
Difficulty level: Beginner+ to Intermediate
Pattern developed by Ranger Cody Lopez.
Materials:
- 4 mm crochet hook
- Two 8 mm safety eyes
- One 4 medium–weight skein of tan/light brown yarn
- One 4 medium–weight skein of dark brown yarn
- Cotton/Polyester stuffing
- Scissors
- Yarn needle
- Stitch markers (optional but helpful)
Abbreviations:
Ch – ChainSt(s) – Stitch(es)
Rnd(s) – Round(s)
Sc – Single Crochet
Inc – Increase
Dec – (Invisible) Decrease
Sl st – Slip stitch
[#] – Stitch count in round

NPS/ M. Stringer
Head and Body:
Use the light brown or tan yarn for this section.
Rnd 1: 6 sts in a magic circle [6]
Rnd 2: inc x6 [12]
Rnd 3: (sc, inc) x6 [18]
Rnd 4: (sc x2, inc) x6 [24]
Rnd 5: (sc x3, inc)x6 [30]
Rnds 6-10: (5 rnds total): sc all around [30]
Rnd 11: (sc x3, dec) x6 [24]
Rnd 12: (sc x2, dec) x6 [18]
Rnd 13: sc all around [18]
Rnd 14: (sc x2, inc) x6 [24]
Rnd 15: (sc x3, inc) x6 [30]
Rnd 16: (sc x4, inc) x6 [36]
Rnd 17: (sc x5, inc) x6 [42]
Stop crocheting and insert safety eyes between rounds 5 and 6 with 8 stitch holes between the two eyes. The 8 stitch holes will become the head’s top. Secure the eyes.
Rnds 18-22: (5 rnds total): sc all around [42]
Stop crocheting and stuff the head of the beaver.
Rnds 23-27: (5 rnds total): sc all around [42]
Rnd 28: (sc x5, dec) x6 [36]
Rnd 29: (sc x4, dec) x6 [30]
Rnd 30: (sc x3, dec) x6 [24]
Rnd 31: (sc x2, dec) x6 [18]
Stop crocheting and stuff the body of the beaver.
Rnd 32: (sc, dec) x6 [12]
Rnd 33: dec x6 [6]
Leave a long tail and invisible fasten off. Insert needle into front loops of sts in rnd 33 and pull tight. This will close the gap in the piece. Piece may close without the need to insert into all 6 sts. Bury yarn in piece to secure.
Front Legs:
Use the same yarn as the body. Make two.Rnd 1: 6 sts in a magic circle [6]
Rnd 2: inc x6 [12]
Rnd 3-5: (3 rnds total): sc all around [12]
Leave a long tail and invisible fasten off. Begin sewing onto the bottom portion of the body beginning at rounds 15 and 16 and extending between rounds 18 and 19. Before finishing, stuff foot lightly. Finish sewing and bury excess yarn in the piece’s body to secure.

NPS/ M. Stringer
Back Legs:
Use the same yarn as body and front legs. Make two.Rnd 1: 6 sts in a magic circle [6]
Rnd 2: inc x6 [12]
Rnd 3-4: (2 rnds total): sc all around [12]
(The following uses short rounds to make the leg’s curved heel.)
Rnd 5: sc x6 and turn [6]
Rnd 6: sc x5 and turn [5]
Rnd 7: sc x4 and turn [4]
Rnd 8: sc x3 and turn [3]
Rnd 9-12: (4 rnds total): sc all around [12]
Rnd 13: sc, inc x3, sc x3, inc x3, sc x2 [18]
Rnd 14: sc all around [18]
Stop crocheting and stuff only the foot/heel section of the leg.
Rnd 15: sc, dec x3, sc x3, dec x3, sc x2 [12]
Rnd 16: dec x6 [6]
Flatten leg section of the piece. Insert hook going into the front of st 1 of rnd 16 and extending across through st 4 of rnd 16. Sc x1. Then insert hook going into the front of st 2 of rnd 16 and extending across through st 3 of rnd 16. Sc x1. [2]
Fasten off leaving a long tail and sew the leg onto the body between rounds 22 and 28. For a flatter look, insert needle through both sides of the leg. Only the leg portion should be sewn on, leaving the foot lower than the body and slightly off to the side. Bury yarn tail in body to secure.
Tail:
Use dark brown yarn for this section.
Rnd 1: ch 6, sc x4, sc x3 in next st, sc x4 in the underside of the ch, sc x3 in next st. [14]
Rnd 2: (sc x4, inc x3) x2 [20]
Rnd 3-7: (5 rnds total): sc all around [20]
Rnd 8: (sc x4, dec x3) x2 [14]
Rnd 9-12: (4 rnds total): sc all around [14]
Rnd 13: (sc x5, dec) x2 [12]
Rnd 14-15: (2 rnds total): sc all around [12]
Rnd 16: Flatten tail and insert hook through st 1 of rnd 15 and extend through st 12 of rnd 15. Sc x1. Then insert hook through st 2 of rnd 15 and extend through st 11 of rnd 15. Sc x1. Continue sc by pairing sts 3 and 10, then sts 4 and 9, then sts 5 and 8, then sts 6 and 7 of rnd 15. [6]
Fasten off leaving a long tail and sew the tail on the back of the beaver, centering it above rnd 33. Bury yarn tail in body to secure.
Brows:
Sl st in st above and to the side the eye. Sc x3 in sts directly above the eye following the curve of the eye. Leave a tail and fasten off. Bury yarn tails in piece to secure. Do for both eyes.
Ears:
Use same yarn as body and legs. Make two.
Rnd 1: 6 sts in a magic circle [6]
Rnd 2: Ch x1 and turn. Then (sc, inc) x3 [9]
Leave a long tail and fasten off. Sew between rounds 8 and 11 of the head. Ears should sit two rnds behind the eyes and sewn on curved to give depth to the ear.
Nose and Mouth:
Using about an arm’s–length of dark brown yarn, embroider the nose on the center of the beaver’s face, going through the same stitches multiple times for a fuller nose. From the bottom of the nose, embroider a “Y” shape for the beaver’s mouth.
You Are Done!
Now that you're done with your beaver, show off all your hard work! Take a picture and tag Great Falls Park on social media for a chance to have your crocheted beaver shared!
Can You Spot the Difference?
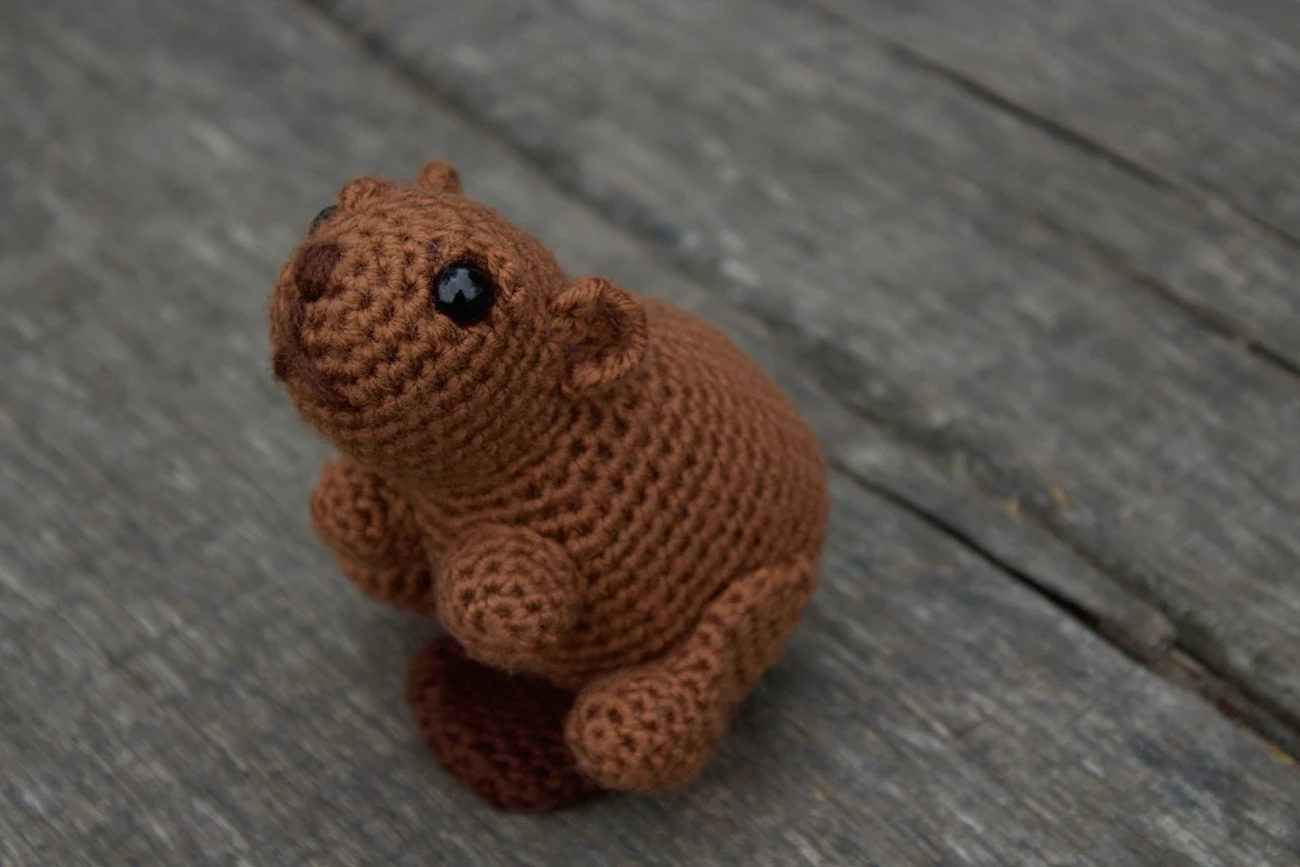
Left image
The completed crocheted beaver sitting on a bench at Great Falls!
Credit: NPS/ E. Collins
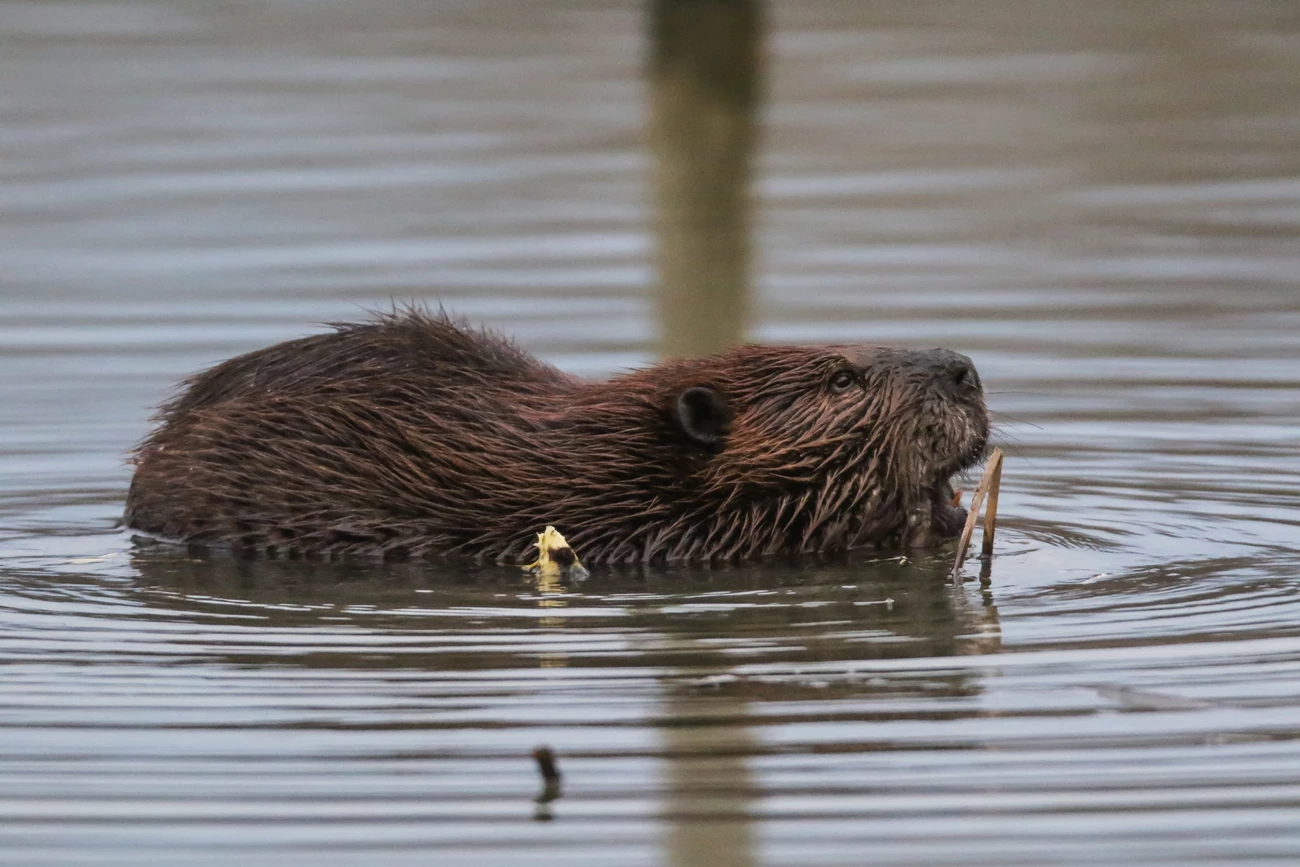
Right image
A beaver ventures into the water. Respect all wildlife at Great Falls by keeping your distance! If they are reacting to you, you are too close and calmly walk away.
Credit: © Rick McMeechan