Last updated: January 15, 2025
Lesson Plan
Attributes and Classification in Archeology

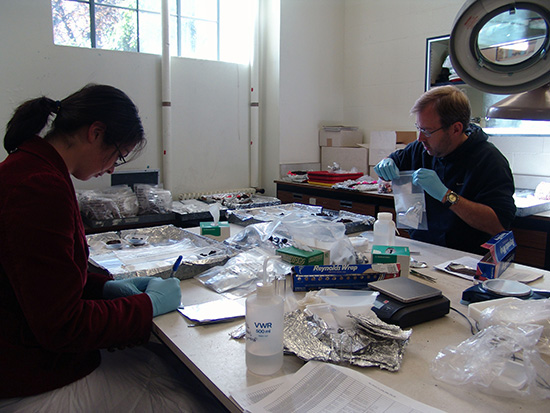
Archeologists classify and catalog artifacts based on their attributes.
NPS photo.
- Grade Level:
- Middle School: Sixth Grade through Eighth Grade
- Subject:
- Science,Social Studies
- Lesson Duration:
- 60 Minutes
- Additional Standards:
- National Social Studies Standard Correlation: K-4:2b, 2d, 2f 5-8: 1c, 2d, 2f (Classification and attributes are also found in state science and language arts standards)
- Thinking Skills:
- Applying: Apply an abstract idea in a concrete situation to solve a problem or relate it to a prior experience. Analyzing: Break down a concept or idea into parts and show the relationships among the parts.
Essential Question
How do archeologists classify objects based on their attributes?
Objective
Students will: 1) Understand the how and why of classification and attributes and 2) Classify specific objects based on common attributes.
Background
This lesson plan is one in a series that uses archeology to teach concepts everyone needs to know. It can be used as-is, or be customized with images, objects, or stories representative of a particular park or place. Lesson plans in this series are:
- What Is (and Isn’t) Archeology?
- Inference vs. Observation in Archeology
- Primary vs. Secondary Sources in Archeology
- Stratigraphy and Superposition in Archeology
- Coordinates and Gridding in Archeology
- Attributes and Classification in Archeology
- Protecting Our Archeological Past
Preparation
Create artifact kits for 3-4 groups, depending on the size of the class. Each artifact kit should have about 20 familiar objects, and every kit should have the same items.
Print out the file "Attributes Classification Worksheet" for each student.
Materials
Download Attributes Classification Worksheet
Lesson Hook/Preview
Select a "context" that contains a collection of objects, such as a desk or utensil drawer, a trash can, a backpack, or a lunch sack. Have the students gather around it.
Say that the class will use their powers of observation to classify objects based on their attributes, like archeologists do. Explain that archeologists use classification to start understanding what artifacts mean. An attribute can include an object's physical characteristics, its use or purpose, and its place and time (or context).
Ask the students to sort the objects by material, then use. Next, have the students sort the objects by shape, then color. Have the students identify the relationships of the artifacts to each other.
Conclude the warm-up by explaining that this process is like what archeologists do.
Procedure
Put students in small groups of 3-4.
Give each group an artifact kit. Explain that they will classify the artifacts into categories according to their attributes. Remind students to think like an archeologist and keep context and purpose in mind as they sort.
Have them list items on the "Attribute Classification Worksheet" with the attribute they used to place them in their categories.
When all groups have finished, have them share their artifact kit sheet with the class, explaining why they sorted objects the way they did.
When groups have objects in different categories, explore with them the idea that one system is not better than another. It depends on what the archeologist wants to know. An archeologist will study the artifacts in a lab and ask questions that will help them analyze or discover more about the artifacts.
Work together to come up with some questions about the objects in the artifacts kit. For example, where might these objects be used? Who is using them? Write the questions on the board.
Vocabulary
Archeology: The study of the past based on the material evidence that people left behind
Artifact: An object made or used by humans
Attributes: The characteristics of an object, such as its shape, size, color, or use
Classification: The process of sorting objects into categories based on common attributes
Context: The relationship of artifacts to each other, and to where they were found
Assessment Materials
Have students regroup and classify their artifacts again using the questions asked. Make a new list.
Contact Information
Email us about this lesson plan
